User manual
How to use Composer Assistant.
Getting started
What you need
- A Mac or a Windows PC (64-bit). On a Mac, Composer Assistant runs as a VST3 or AU plugin and as a standalone app. On Windows, as a VST3 plugin and as a standalone app.
- A DAW that loads VST3 or AU instruments, or no DAW at all: the standalone app works on its own. Pro Tools isn't supported (there's no AAX version).
- An internet connection. The music is made by our AI on our servers, so every take needs a connection.
- Your Composer Assistant account: the email address you bought with.
The full list of systems, formats and install locations is on the technical specifications page.
Install on a Mac
- Go to composerassistant.com and sign in with the email you bought with.
- Click Download for macOS. You get the installer, a
.pkgfile, signed and notarized by Apple. - Open it and follow the steps. It installs the standalone app in Applications, plus the VST3 and AU plugins for your DAWs.
- Open your DAW, or restart it if it was open, so it finds the plugin. If it asks to scan for new plugins, let it.
Install on Windows
- Go to composerassistant.com, sign in, and click Download for Windows. You get an
.exeinstaller. - Windows may show a SmartScreen warning ("Windows protected your PC"), because the installer isn't code-signed yet. Click More info, then Run anyway.
- Follow the steps. It installs the VST3 plugin and the standalone app. Then open your DAW, or restart it if it was open, so it finds the plugin.
Load it in your DAW
Composer Assistant loads as an instrument. Create an instrument track (in Cubase an Instrument Track, in Logic a Software Instrument track, in Ableton Live a MIDI track) and pick Composer Assistant from Cinematic Composing.
Loading it as an instrument matters: it's what lets your DAW play a clip into it, which is how FROM YOUR TRACK works.
Composer Assistant isn't a sound library: it doesn't play the notes your DAW sends it. What you hear from its track is your takes, when you play them in YOUR TAKE. To keep a take, drag it onto a track of your own.
Sign in
Composer Assistant needs you signed in before it can produce.
- Click Sign in in the header, next to the lamp. The button changes to Check your browser.
- Your browser opens a page called Sign in to your plugin. Bought on Cinematic Composing? Click Continue with Cinematic Composing. Otherwise, type your email and open the link we send you.
- The plugin signs itself in. Your plan name appears in the header, and the button now reads Sign out.

You stay signed in on that computer. Using Composer Assistant on another computer of yours? Install it there and sign in the same way.
Your first take
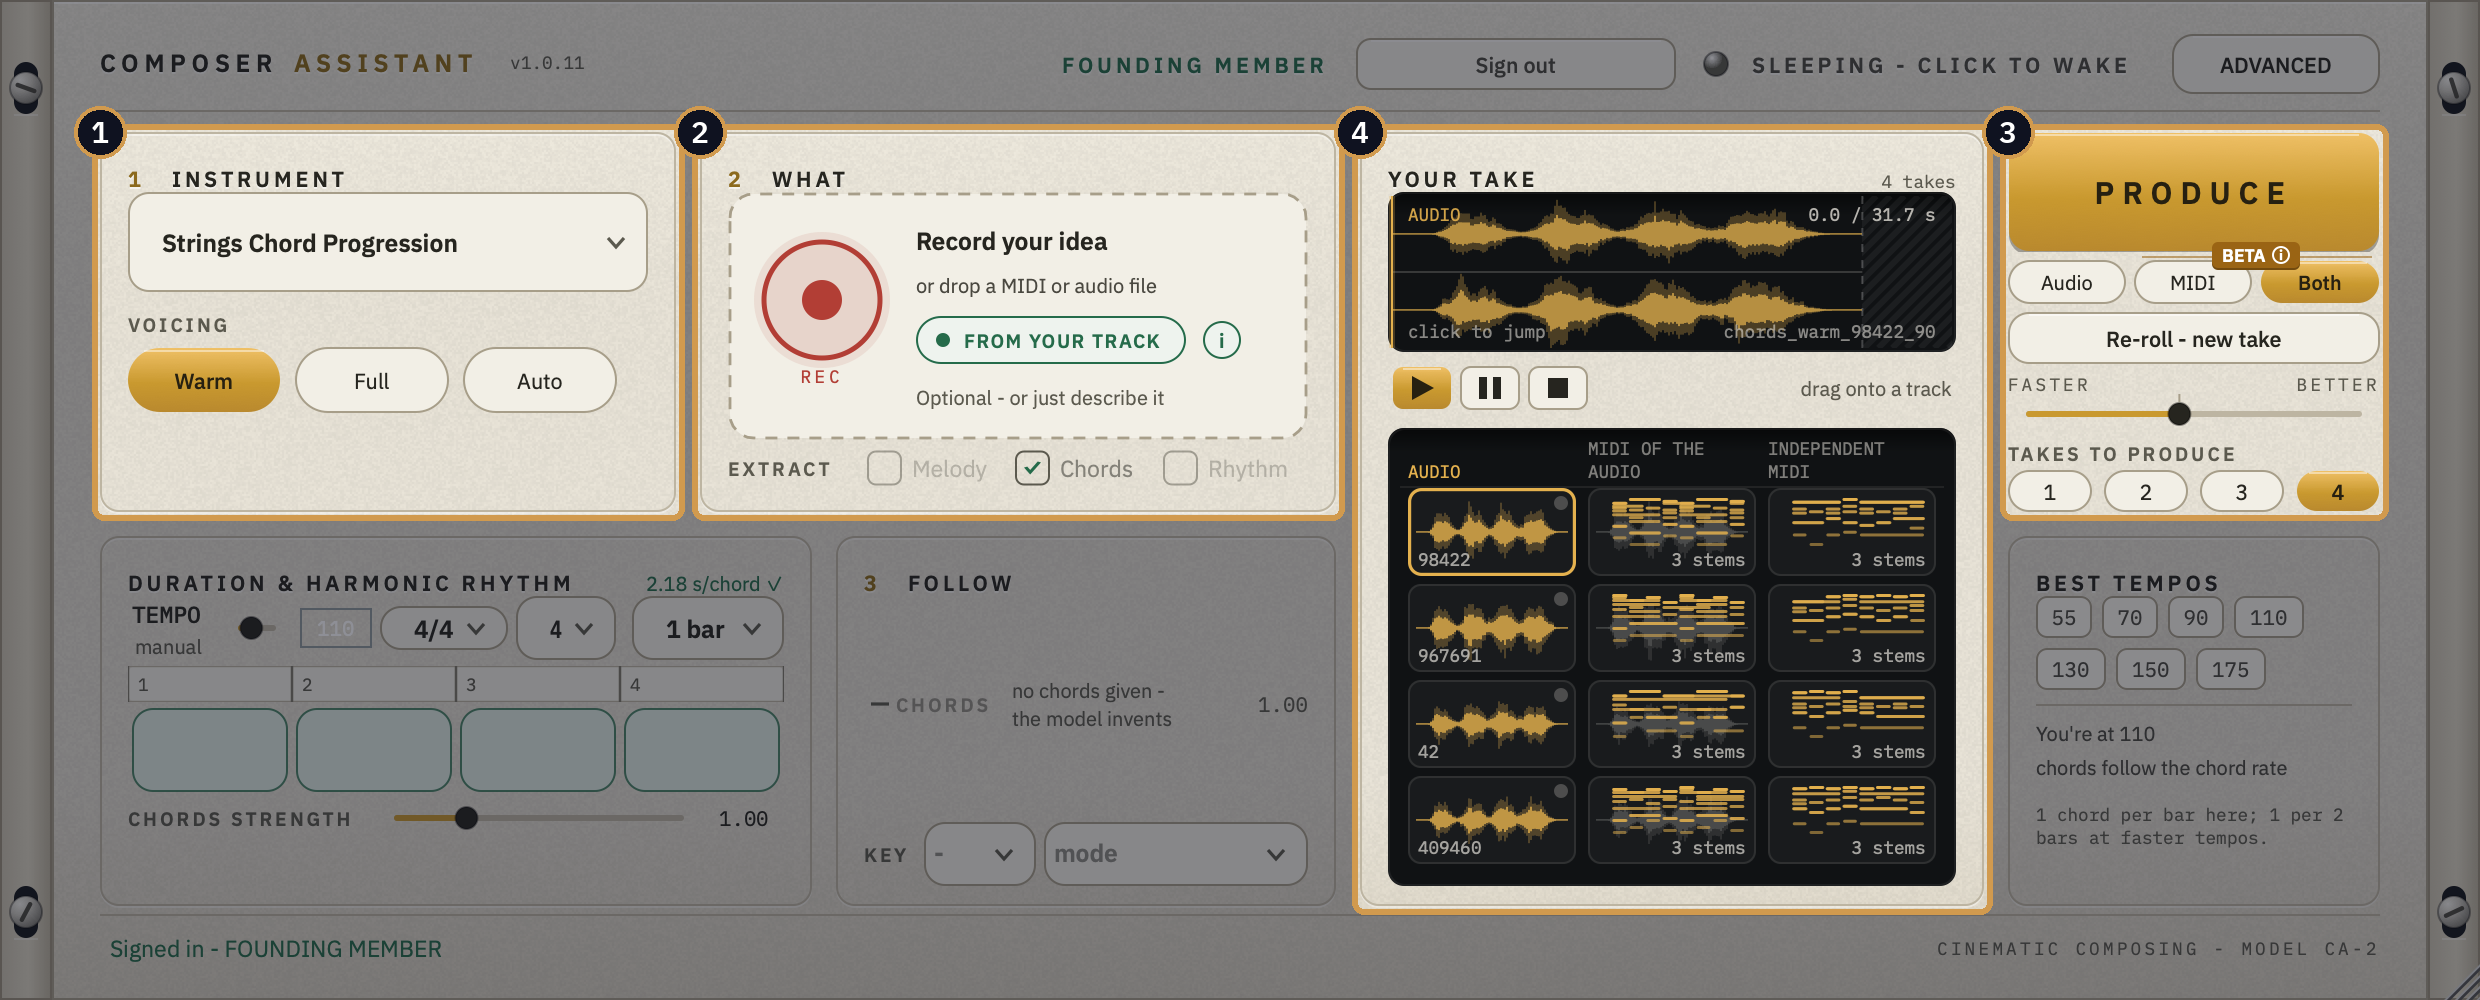
- INSTRUMENT: pick what you want: a chord progression, a motor, an ostinato or percussion.
- WHAT: give it your idea. Record it, drop a MIDI or audio file, or bring it in from your track. This step is optional: with no idea, Composer Assistant invents one.
- PRODUCE: press it, or press Cmd+G (Ctrl+G on Windows). You get four takes by default.
- YOUR TAKE: your takes land here. Click one to hear it. Drag it onto a track in your DAW.
The first take of the day can take about a minute while the engine warms up. After that, takes come back much faster. If the lamp in the header says SLEEPING - CLICK TO WAKE, click it while you set up, and the engine will be warm when you press PRODUCE.
The basic introduction below was recorded on an earlier version, when PRODUCE was still called GENERATE. The steps are the same.
The plate at a glance
Every area, numbered
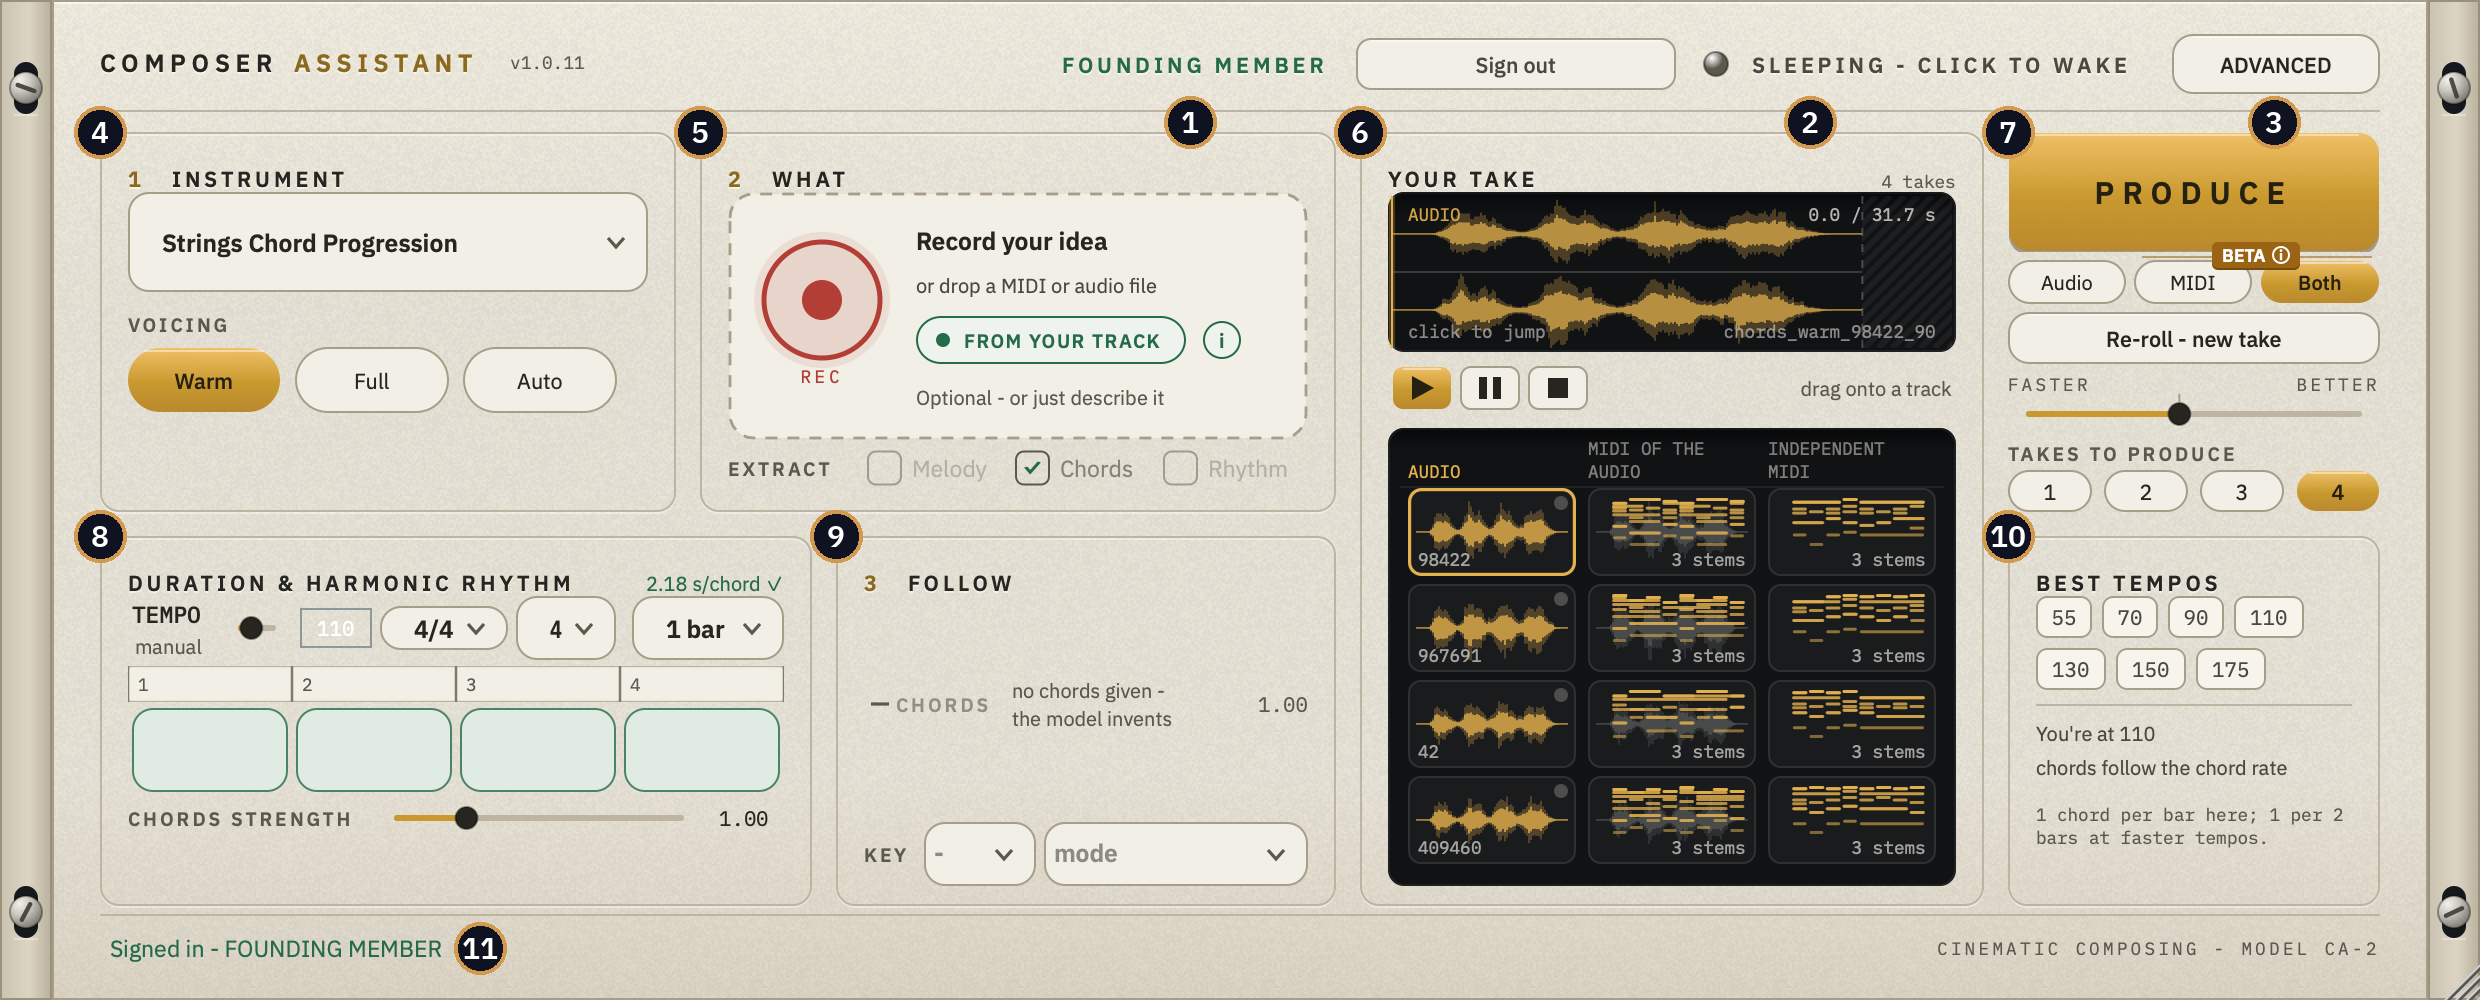
- Your account: your plan name and Sign in / Sign out. See Your plan, usage and updates.
- The server lamp: whether the engine is ready. Click it to wake it (below).
- ADVANCED: describe the take in words, the seed and finer controls. See Best tempos and Advanced.
- 1 INSTRUMENT: what to produce: chord progression, motor, ostinato or percussion. See Instrument.
- 2 WHAT: your idea: record it, drop a file, or take it from your track. See WHAT.
- YOUR TAKE: the player, and every take you've produced. See Your take.
- PRODUCE: the button, what you get (audio, MIDI or both), Re-roll, speed and how many takes. See Produce.
- DURATION & HARMONIC RHYTHM: tempo, meter, bars and the chords. See Duration and harmony.
- 3 FOLLOW: how closely each take follows your idea. See Follow.
- BEST TEMPOS: the tempos each instrument was trained at.
- The status line: what's happening now, and what to do next.
The small numbers painted on the plate (1 INSTRUMENT, 2 WHAT, 3 FOLLOW) are the order to set things up in. Then press PRODUCE.
The server lamp
The lamp in the header shows the state of the engine that makes your takes.
| The lamp says | What it means |
|---|---|
| READY | The engine is warm. Takes come back fast. |
| WARMING UP | The engine is starting. The first take of the day can take about a minute. |
| WORKING | Your takes are being made. |
| SLEEPING - CLICK TO WAKE | The engine is resting. Click the lamp to wake it, or just press PRODUCE. |
Resize the window
Drag the window's corner. It goes from 992 × 400 up to 1860 × 750 and always keeps its shape.
Keyboard shortcuts
Cmd+G (Ctrl+G on Windows) produces, R re-rolls. The full list is in the Reference.
Instrument
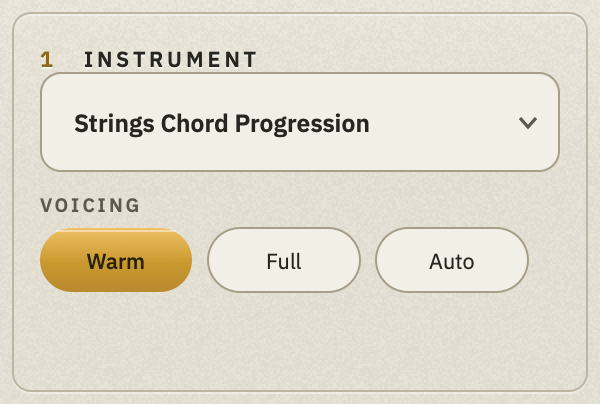
Pick the instrument
Open the menu at the top of 1 INSTRUMENT and pick what you want to produce. Under it, a row of buttons picks the flavor of that instrument.
| Instrument | The buttons under it | What to give it in WHAT |
|---|---|---|
| Strings Chord Progression | VOICING: Warm, Full or Auto | Chords: typed in the grid, a MIDI file, a recording, or a clip from your track |
| Strings Motor | INTENSITY: Mid, High, Growing or Rhythmic Patterns | Chords and/or a rhythm |
| Strings Ostinato | REGISTER: High, Low or Auto | A melody (one note at a time), followed exactly, or chords, and it invents the figure. It needs a key. |
| Cinematic Percussion Bed | LAYER: Full, High, Mid or Low | A rhythm: MIDI hits or a recording of you tapping. With nothing, it plays its own groove. |
Melodic is in the menu too, greyed out: it's coming.
The list of instruments comes from our servers, so a new instrument can appear here without you installing anything.
Ostinato needs a key
Strings Ostinato won't produce without a key. If the status line says Pick a key first - root and mode, set the KEY row in FOLLOW: a root note and a mode. Besides major and minor, it knows phrygian, locrian, lydian dominant and super locrian.
Which tempo?
Every instrument was trained at certain tempos. They're listed in BEST TEMPOS, bottom right of the plate. Your takes sound best at or near them.
WHAT
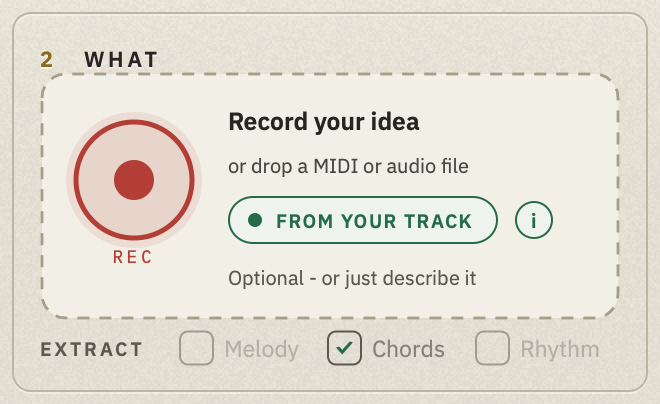
2 WHAT holds your idea: the music the take should grow from. There are three ways to give it one, and it's optional: with nothing in WHAT, Composer Assistant invents.
Drop a MIDI or audio file
Drag a MIDI file or an audio file from your computer, or a clip from your DAW, and drop it on WHAT. WHAT is the only place on the plate that takes a drop.
- From Cubase and Studio One, MIDI clips and audio events drop straight in.
- From Logic, GarageBand and Ableton Live, a dragged clip carries no notes a plugin can read. Use FROM YOUR TRACK instead. On a Mac, WHAT tells you so when you try.
- In the standalone app, export the clip as a MIDI file and drop the file.
Choose what to follow: EXTRACT
Under WHAT, EXTRACT says what to take from your idea: Melody, Chords and/or Rhythm. The boxes on offer depend on the instrument: a chord progression reads chords, a percussion bed reads rhythm. Tick what you want the take to follow. FOLLOW then shows how strongly it will follow each one.
Record your idea (REC)
Hum it, play it, or tap it into your microphone.
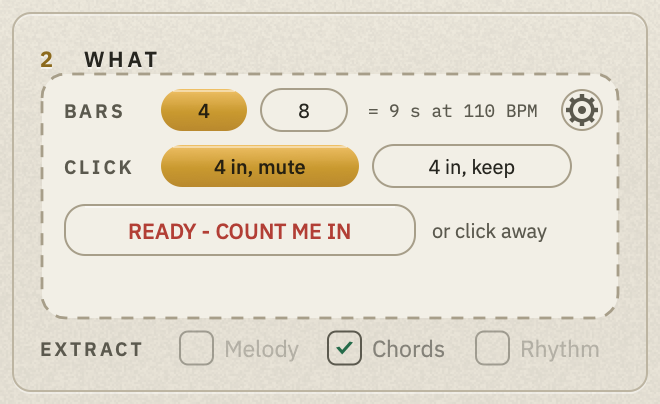
- Press REC. The setup appears.
- Pick BARS: 4 or 8.
- Pick the click: 4 in, mute (a four-beat count-in, then silence, so the click never gets into your recording) or 4 in, keep (the click keeps going while you play).
- Press READY - COUNT ME IN. Four clicks, and you're in.
- Play. The take stops by itself on the last barline and lands in WHAT, with a receipt such as 8 bars @ 120 - 14 hits - cleaned.
The first time you press REC on a Mac, macOS asks for permission to use the microphone. Allow it. (If you said no, turn it on in System Settings › Privacy & Security › Microphone.)
Where REC listens: the gear
The gear in REC's setup picks the input (your microphone or interface), its channel, and where the click plays. A live level meter shows the input. Composer Assistant measures the delay between the click and your microphone and lines your take up by itself ("click to mic: 23 ms, lined up automatically"). There's nothing to calibrate.
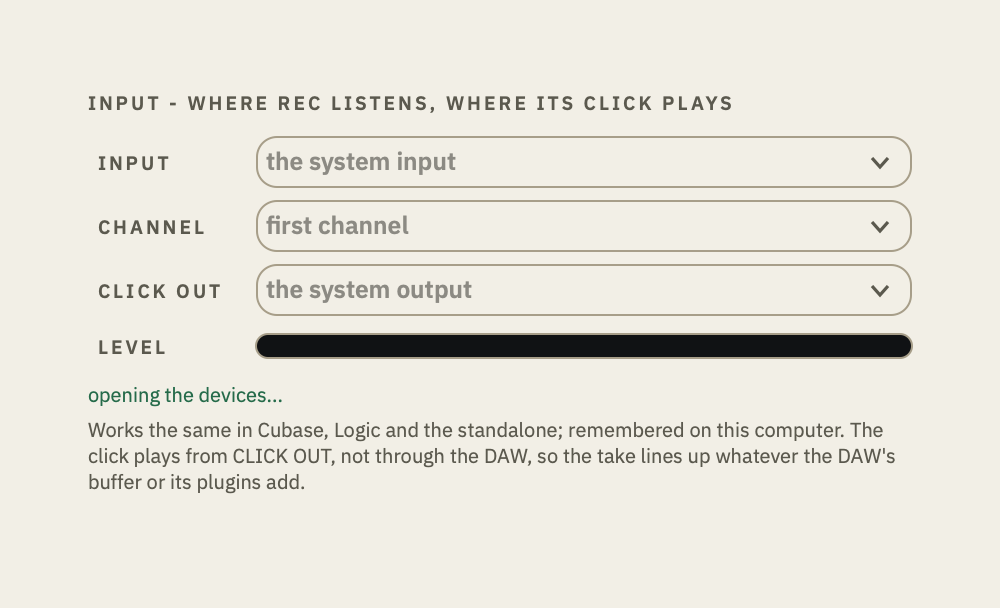
Your choice is remembered on that computer. Every recording is saved in the Recordings folder inside Music › Composer Assistant.
Take it from your track
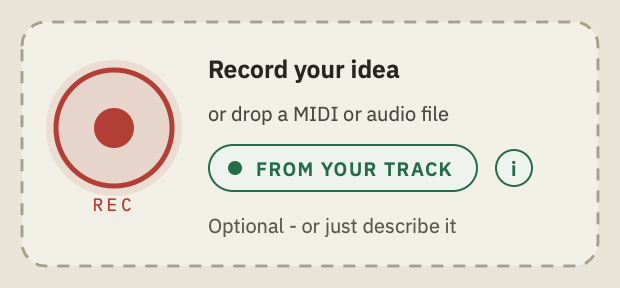
Play a clip from your DAW into Composer Assistant and it writes down the exact notes. See FROM YOUR TRACK.
Clear WHAT
To start over, click the small x in WHAT's corner. With WHAT empty, you can still describe the take in words in ADVANCED, or give no idea at all.
FROM YOUR TRACK
What it does
Your DAW plays a clip into Composer Assistant, and Composer Assistant writes down the exact notes as they play. After 4 or 8 bars, the notes land in WHAT as a MIDI file, ready to produce.
It works in any DAW that can play MIDI into an instrument track, because nothing has to be dragged. That matters in Logic, GarageBand and Ableton Live: they can't hand a plugin a clip's notes by dragging it.
This is the short film Composer Assistant plays the first time you press FROM YOUR TRACK. To watch it again, click the (i) beside the button.
Before you start
- Composer Assistant is loaded as an instrument on a track of its own (see Getting started).
- FROM YOUR TRACK is in the plugin (VST3 and AU, Mac and Windows). The standalone app doesn't have it, because there's no DAW to play the clip. There, export the clip as a MIDI file and drop it on WHAT.
Take the notes, step by step
-
In your DAW, put the clip on Composer Assistant's track, or send its MIDI there.
Tip: copy the clip there, don't move it. Composer Assistant doesn't play the notes it receives, so a clip that sits only on its track goes silent. With a copy on your original track, you keep hearing it while Composer Assistant takes the notes.
-
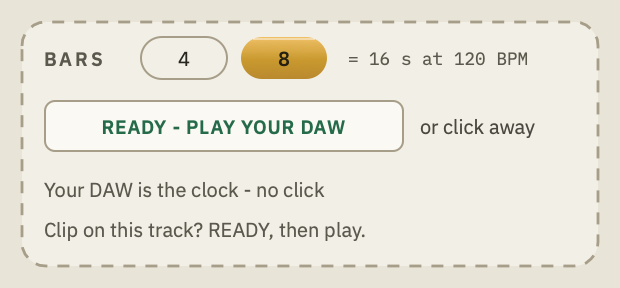
In WHAT, press FROM YOUR TRACK and pick 4 or 8 bars.
-
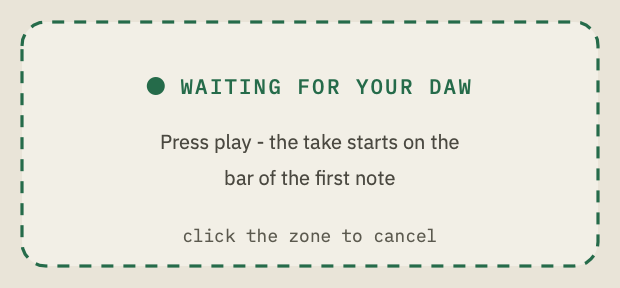
Press READY - PLAY YOUR DAW. WHAT waits for your DAW.
-
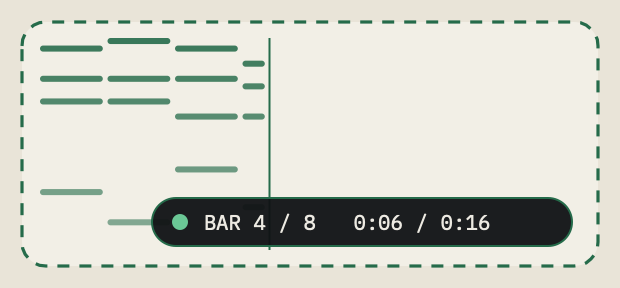
Press play in your DAW. The take starts on the bar of the first note, and you see the notes appear while they play.
-
It stops by itself on the last barline. The notes land in WHAT, and the status line says, for example, Took 8 bars from your track at 120 BPM - ready to produce.
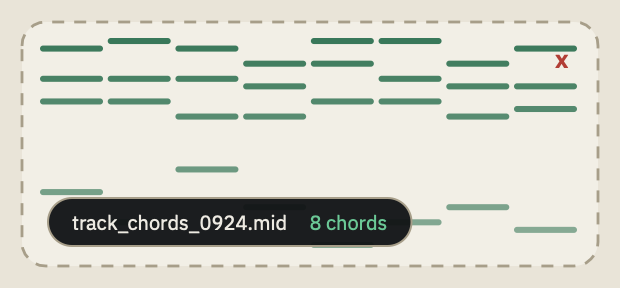
Your DAW is the clock: there's no count-in click, and the tempo and meter come from your project. To cancel while it waits or takes, click the zone. At very slow tempos (under 61 BPM), 8 bars don't fit: take 4.
"Playing, but no MIDI yet"
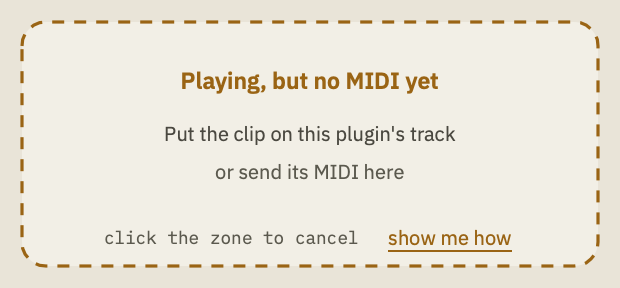
Your DAW is playing, but no notes are reaching Composer Assistant. The clip isn't on its track yet.
- Put the clip (or a copy) on Composer Assistant's own track.
- Sending MIDI from another track? That track's output must reach Composer Assistant. In Ableton Live, Composer Assistant's track must also monitor its input (Monitor → In).
- In FL Studio, put the notes in Composer Assistant's own channel pattern.
- GarageBand can't send MIDI from one track to another. Put the clip on Composer Assistant's track.
Click show me how to watch the film again.
Where the file goes
Every take from your track is saved as a MIDI file, track_<instrument>_<date>_<time>.mid, in the Recordings folder inside Music › Composer Assistant. It's the same file WHAT is holding, so you can use it again or drop it into your DAW.
Dragging a clip from Logic, GarageBand or Ableton
On a Mac, if you drag a Logic, GarageBand or Ableton clip over WHAT, WHAT tells you why it can't land and lights up FROM YOUR TRACK:
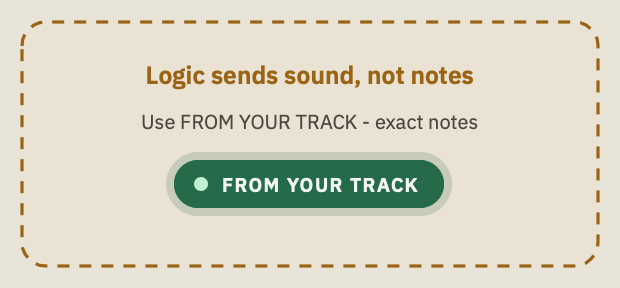
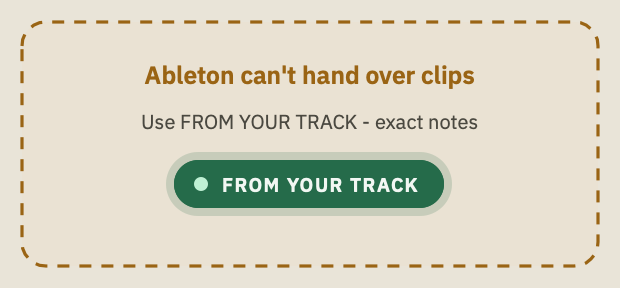
Drags from Cubase and Studio One land as before: MIDI clips, and since version 1.0.11 audio events too.
Where it's been tested
FROM YOUR TRACK was tested on version 1.0.11 in Cubase and in Ableton Live 12. In any other DAW the rule is the same: the clip plays on Composer Assistant's track, or its MIDI is sent there.
Follow
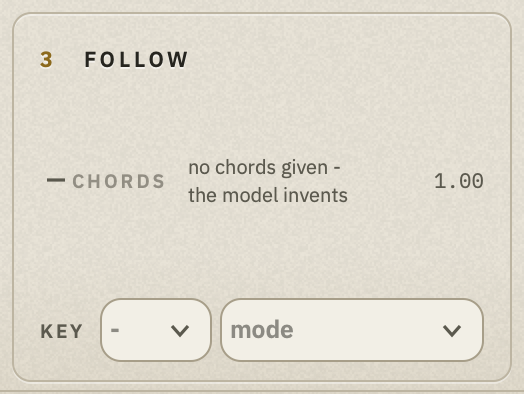
3 FOLLOW answers one question before you press PRODUCE: is the thing I gave it the thing it's going to use? It shows what the next take will follow, and how strongly.
What it follows, and how strongly
FOLLOW has one line for each thing the take can follow (chords, melody, rhythm, style), with its strength beside it. 1.00 is the instrument's normal strength. Higher follows more closely, lower leaves the model more freedom.
- When you give WHAT something to follow (for example, a chord progression from your track), FOLLOW recommends a stronger setting for it, and sets it for you if you haven't touched that fader yourself. The line says where it came from, for example Chords - from your track - 1.50.
- If you've set a strength by hand and it's different from the recommendation, FOLLOW never moves it. It offers a one-click Set 1.50 instead.
- Your strengths are remembered separately for each instrument.
If a line says no chords given - the model invents, that's fine: the take will invent that part.
To turn off the automatic boost, switch off Auto-boost what you follow in ADVANCED. Every strength then stays where you put it.
The training above was recorded on an earlier version, when PRODUCE was still called GENERATE. How strength works hasn't changed.
The key
The KEY row sets a root and a mode.
- Composer Assistant checks your chords against the key and tells you when another key fits them better, with a one-click suggestion (for example Use A minor).
- For chord progressions and motors, the key matters when you give no chords: then it tells the model which world to play in.
- Strings Ostinato needs a key to produce. Its modes go beyond major and minor: phrygian, locrian, lydian dominant and super locrian.
Duration and harmony
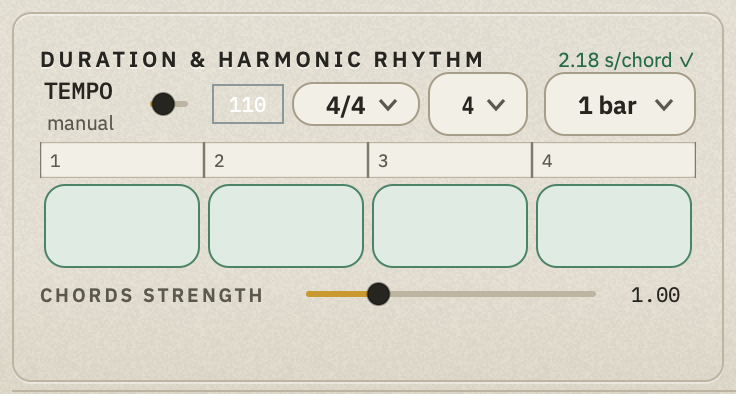
Tempo and meter
- In a DAW, TEMPO follows your project: the line under it says from host. The meter comes from your project too.
- In the standalone app, set the tempo by hand, and pick the meter beside it. The meter is the bar your takes line up to (see SNAP).
Check BEST TEMPOS for the tempos each instrument was trained at.
Bars and chord rate
- BARS: how many bars the chord grid holds.
- EVERY: how often the chord changes, for example a chord every 1 bar.
The readout in the panel's corner shows how long each chord lasts, for example 2.18 s/chord. Green means the model handles that chord rate well. Amber means it's outside what it was trained on: try another tempo or chord rate.
Type your chords
Click a cell in the grid and type a chord symbol: Cm, Ab, Fmaj7, G/B, Dm7… Press Tab to move to the next cell.
CHORDS STRENGTH, under the grid, is how closely the take follows your chords (see FOLLOW).
When your idea in WHAT already carries the harmony (a MIDI file, a recording, a clip from your track), the grid shows the chords read from it:

The chord staff
Click a chord symbol, in the grid or in the chord map of your file, and the score opens: every chord of the progression on one grand staff, with the one you clicked shaded.
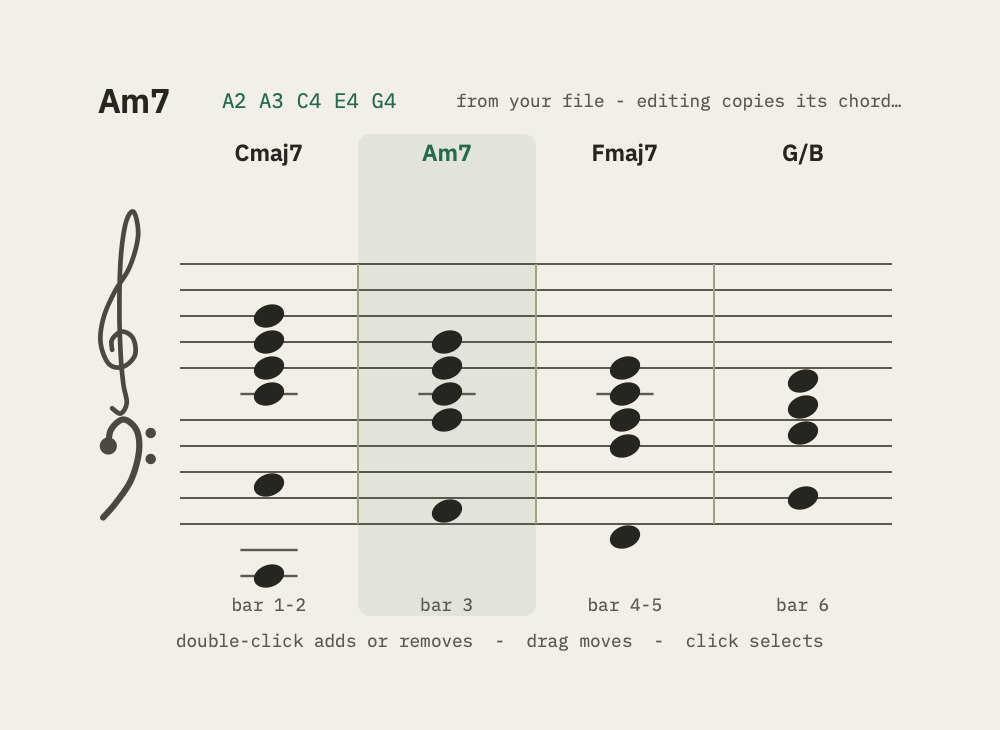
- Double-click on the staff to add a note, or on a note to remove it.
- Drag a note up or down to move it.
- Click a note to select it.
Composer Assistant produces exactly the notes you leave on the staff. A typed chord is voiced from middle C until you change it. Editing a chord of a dropped file copies the file's chords into the grid first; the status line tells you when that happens.
Produce
Press PRODUCE
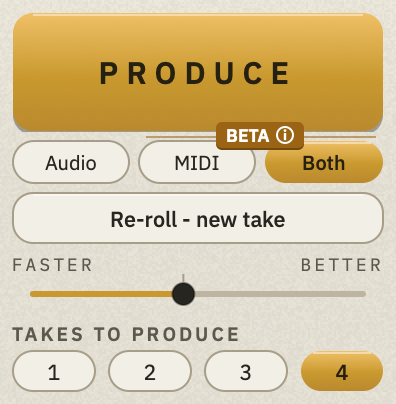
Press PRODUCE, or press Cmd+G (Ctrl+G on Windows). Composer Assistant sends your instrument, your idea and your settings to our servers, and the takes land in YOUR TAKE as they're ready. The lamp reads WORKING while they're made.
You need to be signed in. If you aren't, the status line says so and points to Sign in in the header.
Audio, MIDI or both
Under the button, pick what each take gives you:
- Audio: the take you hear.
- MIDI: MIDI only, the arranged file set, to play on your own libraries.
- Both: audio and MIDI from one press.
MIDI and Both are in beta. Click BETA (i) for a one-page explanation, including a table of what's ready today for each instrument (it's kept up to date from our side).
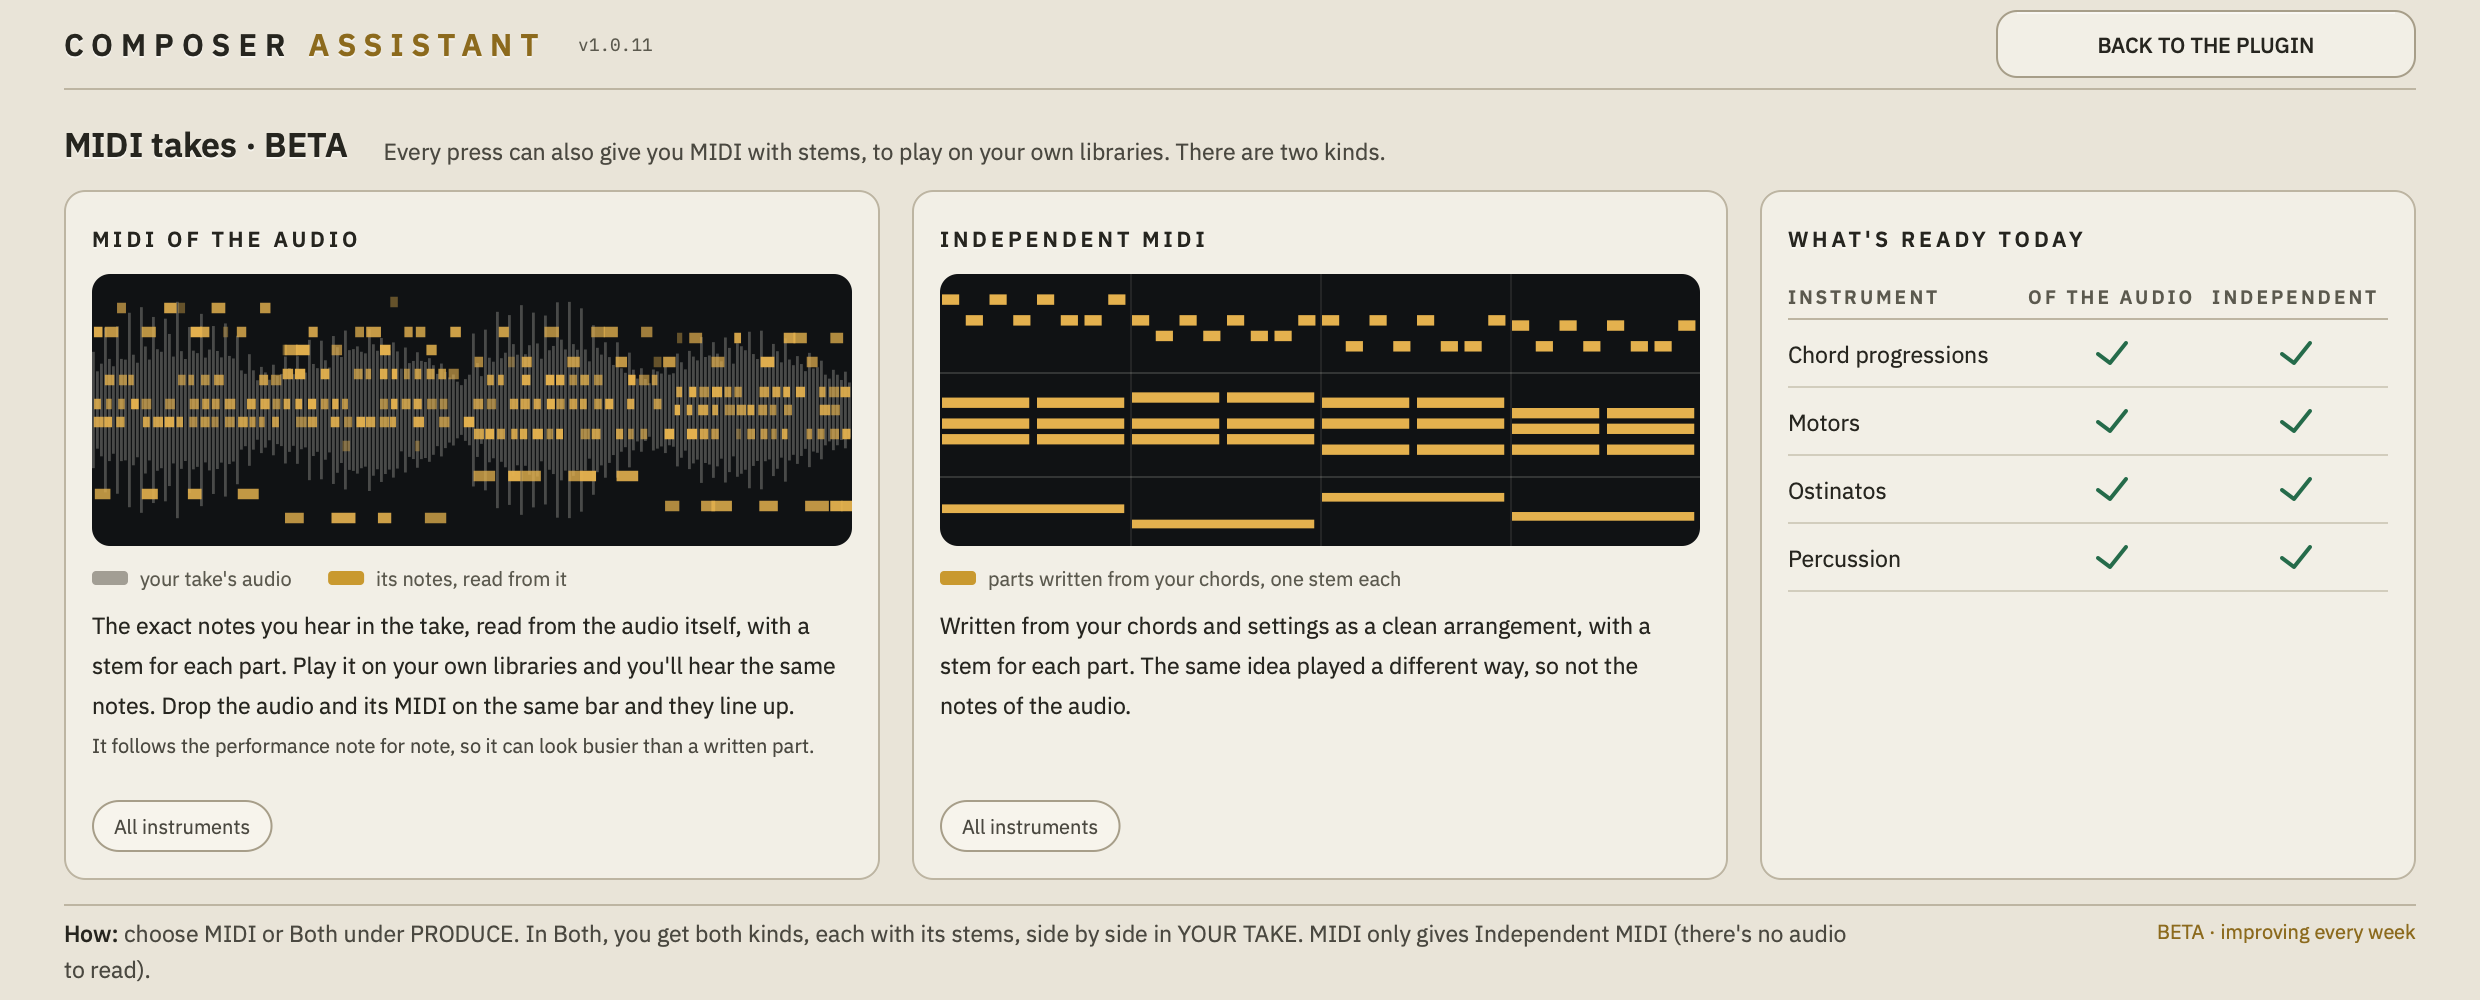
There are two kinds of MIDI, each with a stem for each part:
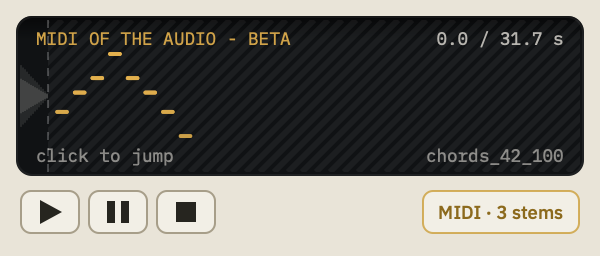
- MIDI of the audio: the exact notes you hear in the take, read from the audio itself. Play it on your own libraries and you'll hear the same notes. Drop the audio and its MIDI on the same bar and they line up. It follows the performance note for note, so it can look busier than a written part.
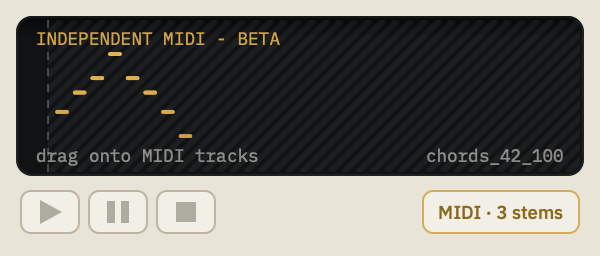
- Independent MIDI: written from your chords and settings as a clean arrangement. It's the same idea played a different way, so it doesn't have the notes of the audio.
With Both, you get both kinds side by side in YOUR TAKE, when that instrument offers them.
How many takes
TAKES TO PRODUCE: 1, 2, 3 or 4 (4 is the default). One press gives you that many takes, each one different.
Faster or better
The FASTER ↔ BETTER fader: to the left, takes come back faster. To the right, you get finer detail. The middle is the default; double-click the fader to return there. It's the same control as Steps in ADVANCED, so the two always agree.
Re-roll
Re-roll - new take (or the R key) produces again with a new random seed and everything else unchanged. Use it when you like the setup and want another take.
Your take
The player
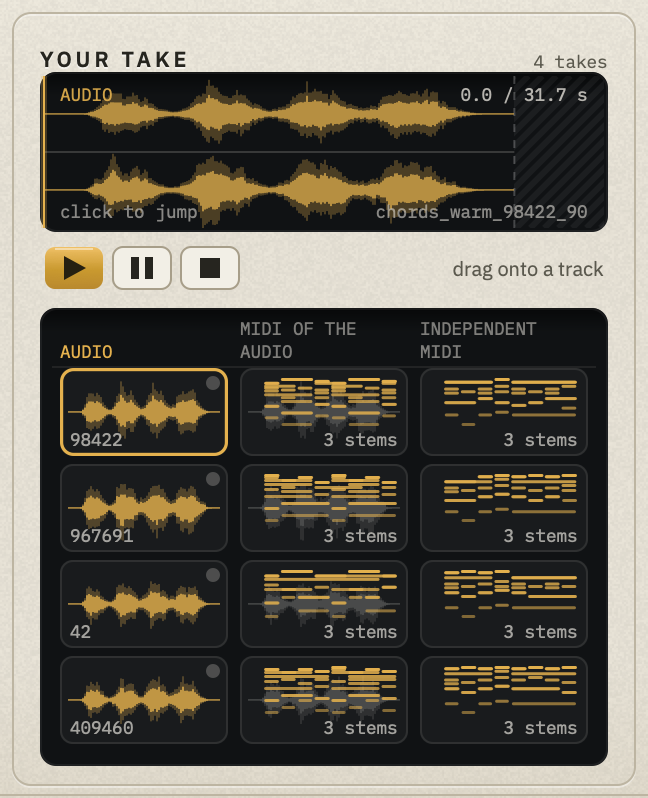
The top of YOUR TAKE plays the take you picked.
- Play, Pause (the line stays where it is) and Stop (back to the start).
- Click anywhere on the tape to jump there and play from that point. Handy for checking bar 7 of four takes without sitting through bars 1 to 6.
- In the standalone app, Space plays and pauses. In a DAW, Space stays your DAW's.
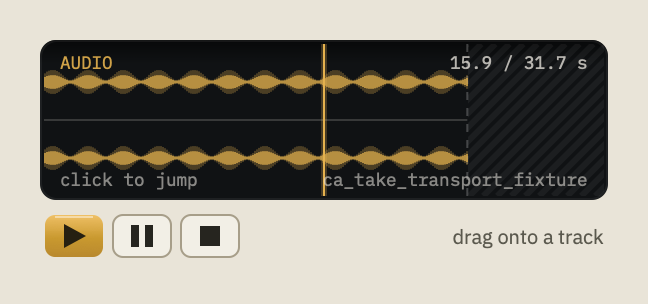
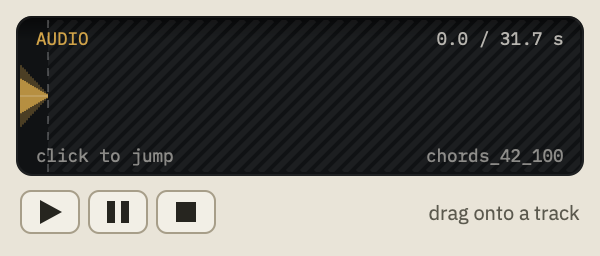
The player shows whichever kind of take you picked: the audio as a waveform, or MIDI as notes with its number of stems.
The feed
Under the player, every take you've produced, newest on top. One row per take, named by its seed (the number in the corner of the audio cell), in three columns:
- Audio: the take itself.
- MIDI of the audio: its notes, read from the audio (see Produce).
- Independent MIDI: the arrangement written from your settings.
A column is filled when you asked for that kind and the instrument offers it. Click a cell to put it on the player.
The feed keeps the last 40 takes of each instrument. To keep one for good, pin it: click the small dot in the top corner of the take's first cell. It turns gold. When new takes arrive while you're scrolled down, a new takes tag tells you.
Drag a take into your DAW
Drag any cell, or the player itself, onto a track. Audio goes on an audio track, MIDI on MIDI or instrument tracks. A drag starts after a small move, so a click stays a click.
It lands on the bar (SNAP)
Every take comes back with beat 1 exactly one bar in, in your DAW's tempo and meter. So drop it on the bar before the one you want, and it lands on the click.
For example, for a take that starts at bar 9, drop it at bar 8.
Where your takes are saved
Every take is saved in Music › Composer Assistant on your computer: the audio as <instrument>_<seed>_<tempo>.wav, and a MIDI take as a folder of the same name. Your recordings and your FROM YOUR TRACK files are in its Recordings folder.
Best tempos and Advanced
Best tempos
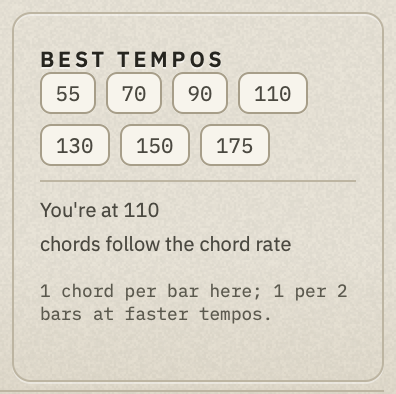
BEST TEMPOS, bottom right of the plate, lists the tempos the current instrument was trained at, and tells you where your tempo sits (You're at 110). Takes sound best at or near these tempos. The notes under them are advice for that instrument, for example how often its chords should change at your tempo.
The list comes from our servers, so it changes with the instrument you pick and can improve without an update.
Advanced
Click ADVANCED, at the right of the header, to open the extra controls. Everything in it rides with every take until you change it.
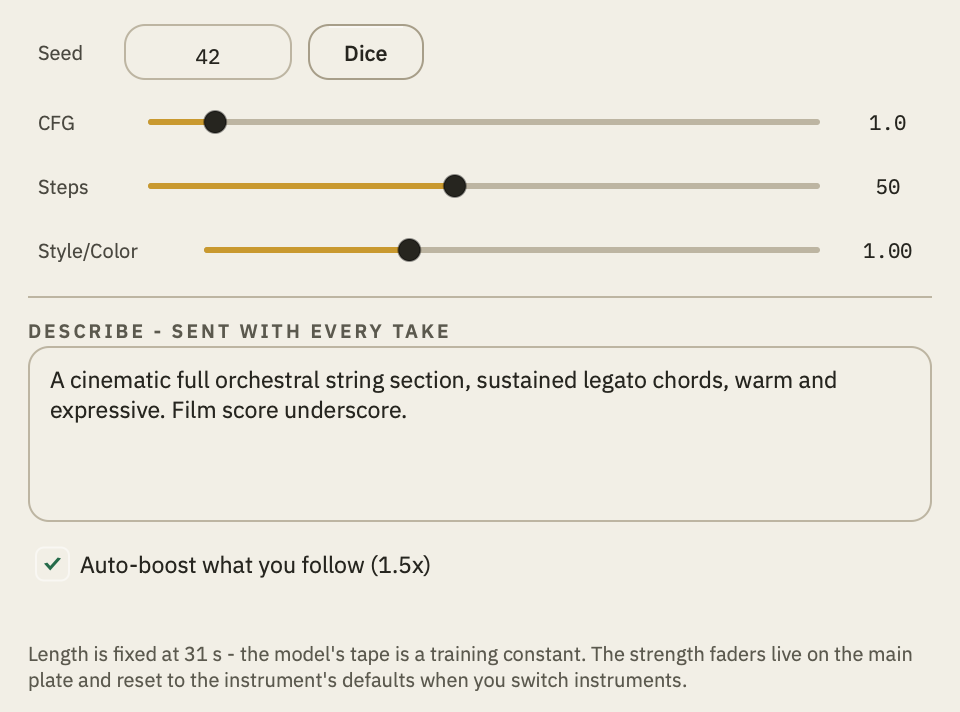
- Describe: the sound in words, for example warm legato strings, hopeful, intimate. It's sent with every take. With nothing in WHAT, a description like sad plus a key and a tempo is enough to start.
- Seed: the number behind each take's variation. It's the number that names a take in YOUR TAKE. The dice picks a new random seed (it doesn't produce); Re-roll picks one and produces.
- CFG: how tightly the take follows your description. 1.0 is the tested setting.
- Steps: detail against speed, the same control as the FASTER ↔ BETTER fader under PRODUCE.
- Style/Color: how much of the trained cinematic color is applied. 1.0 is as trained.
- Auto-boost what you follow: when on, telling WHAT to follow melody, chords or rhythm raises that strength to 1.5× the instrument's default (see FOLLOW). When off, every strength stays where you put it.
Your plan, usage and updates
Your plan
Once you're signed in, your plan's name shows in the header, for example FOUNDING MEMBER or Pro 10X, beside Sign out.
If your plan's term has ended, the header shows Choose a plan instead.
The usage ring
On plans with a monthly usage allowance, a small ring in the corner of the BEST TEMPOS bay shows how much of this month's usage you've used. It's green, turns amber at 70% and red at 90%.
Founding members don't see the ring. Neither does anyone signed out or offline.
Sign out
Click Sign out in the header. That signs Composer Assistant out on this computer. To use it again, click Sign in (see Getting started).
Updates
Composer Assistant tells you when there's a new version. It doesn't update itself.
-
When a new version is out, an amber notice appears across the top of the plugin: Version X is available.

-
Press Update. Your browser opens the download page on composerassistant.com (sign in if it asks).
- Download the installer and run it, as when you first installed. It replaces the old version.
- Restart your DAW, so it loads the new plugin. Cubase, for example, loads plugins when it starts.
Dismiss hides the notice until you next open the plugin.
What's new in each version: the changelog.
Troubleshooting
Quick fixes
| What you see | What to do |
|---|---|
| Sign in first on the status line | Click Sign in in the header, next to the lamp, and finish in your browser. See Getting started. |
| The first take of the day is slow | That's the engine warming up; it can take about a minute. Next time, click the lamp while you set up. |
| The lamp says SLEEPING - CLICK TO WAKE | Click it, or just press PRODUCE. |
| A take fails, or never arrives | Check your internet connection: the music is made on our servers. The status line says what went wrong. Then press PRODUCE again. |
| Pick a key first - root and mode | Strings Ostinato needs a key. Set it in FOLLOW's KEY row. |
| A chord progression take starts a little late or odd | Press Re-roll for another take with the same settings. |
| FROM YOUR TRACK stays amber: Playing, but no MIDI yet | The clip isn't on Composer Assistant's own track. See FROM YOUR TRACK. |
| You can't hear the clip while FROM YOUR TRACK takes it | The clip sits only on Composer Assistant's track. Put a copy on your original track too. |
| A Logic, GarageBand or Ableton drag onto WHAT is refused | Those drags carry no notes. Use FROM YOUR TRACK. |
| REC records nothing (Mac) | Allow the microphone: System Settings › Privacy & Security › Microphone. Then check the input in REC's gear. |
| Windows says Windows protected your PC when you install | The installer isn't code-signed yet. Click More info, then Run anyway. |
| Your DAW doesn't list Composer Assistant | Let the DAW rescan its plugins. Load it as an instrument. Logic loads the AU version; Pro Tools isn't supported. |
| After an update, your DAW still shows the old version | Restart the DAW: it loads plugins when it starts. |
| FROM YOUR TRACK isn't in WHAT | You're in the standalone app. FROM YOUR TRACK is in the plugin, inside a DAW. |
Still stuck?
The videos on the home page answer the most common questions, from what the sound is made of to how much control you get.
Reference
Keyboard shortcuts
These work while the plugin window has the keyboard focus.
| Keys | What they do |
|---|---|
| Cmd+G (Ctrl+G on Windows) | Produce |
| R | Re-roll: a new take, everything else unchanged |
| Space | Play / pause the take on the player (standalone app only; in a DAW, Space stays your DAW's play button) |
| Esc | Close the FROM YOUR TRACK film |
Where your files are
| What | Where |
|---|---|
Your takes (audio .wav, and a folder per MIDI take) |
Music › Composer Assistant |
Your REC recordings and FROM YOUR TRACK files (track_….mid) |
Music › Composer Assistant › Recordings |
On a Mac, the Music folder is the one in your home folder: ~/Music/Composer Assistant.
Specifications
Supported systems, plugin formats, install locations and DAWs: technical specifications.
Version history
Every version, newest first, in plain English: the changelog. This manual describes version 1.0.11.